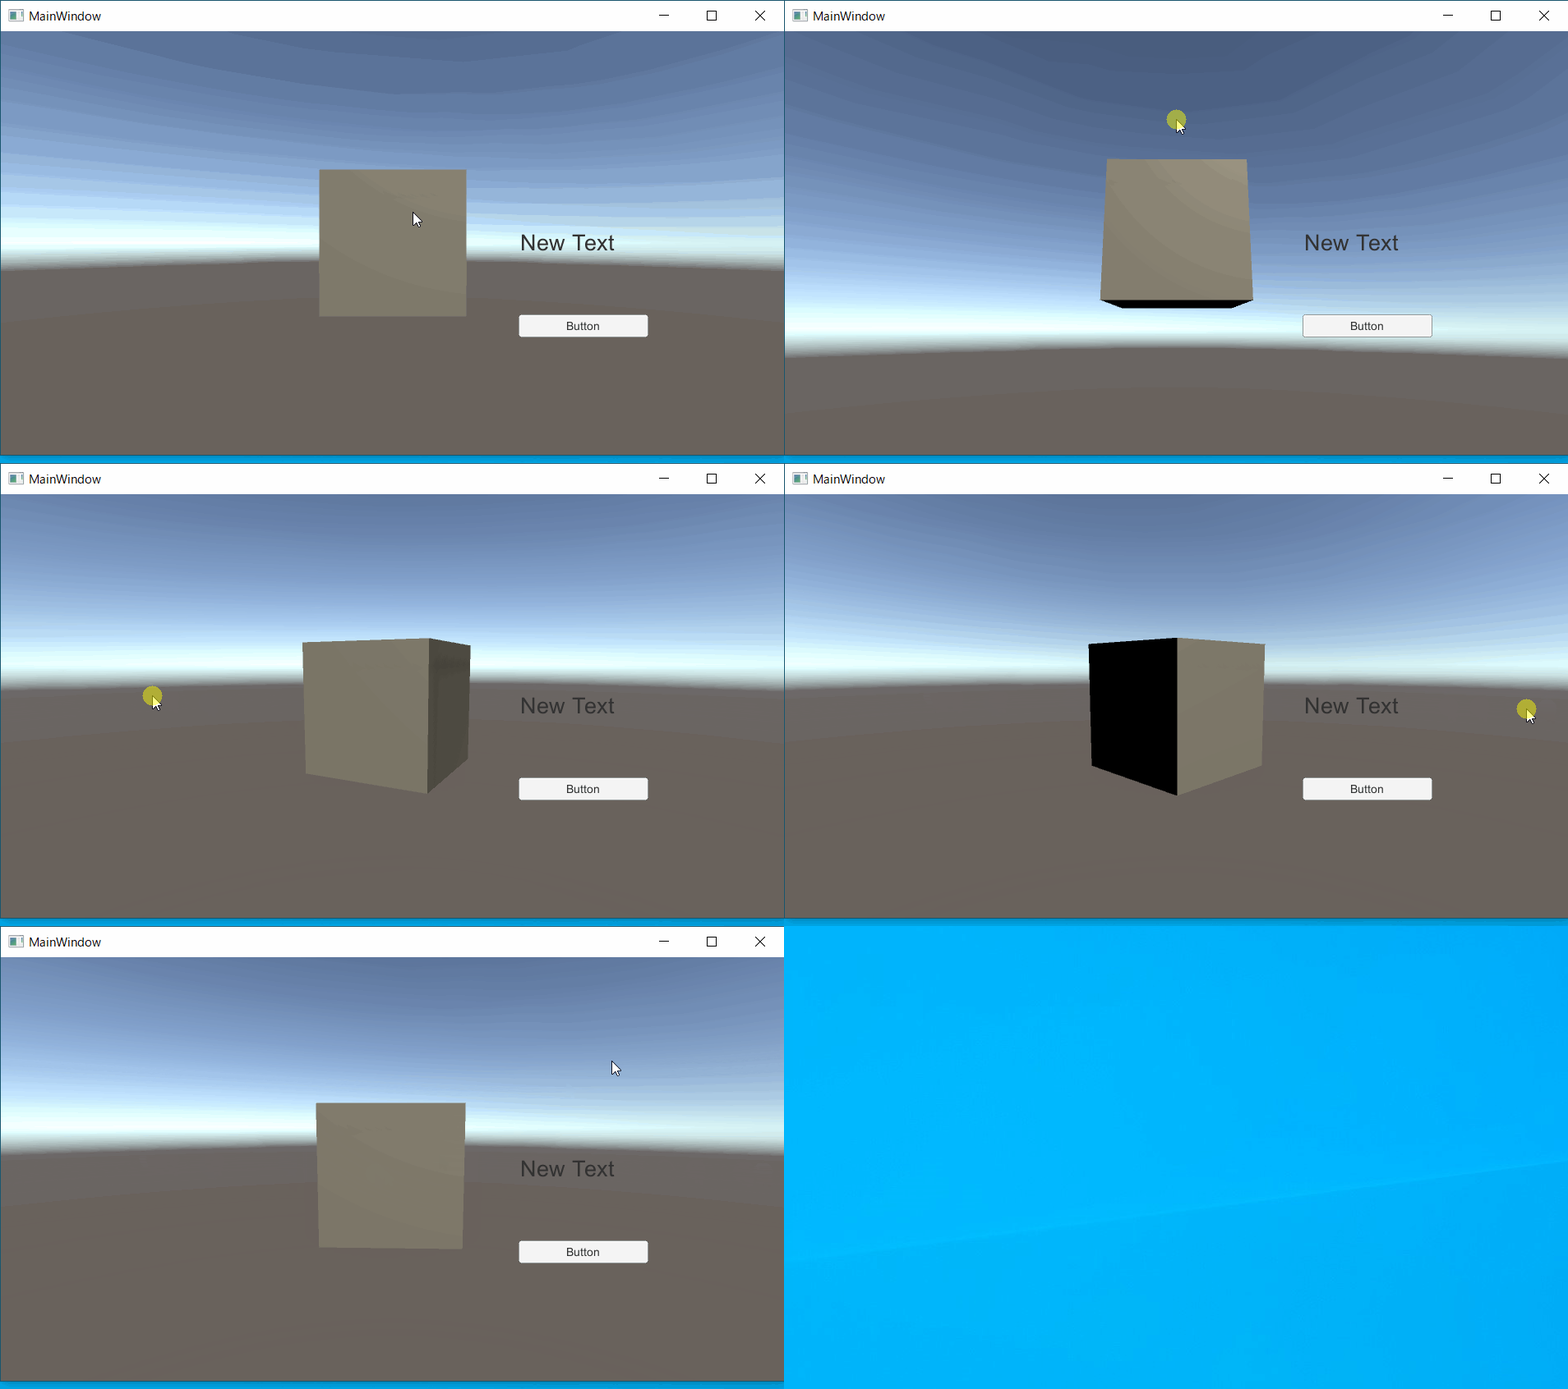
Unity 2019.3以降、「Unity as a Library」というAndroidやiOSのネイティブアプリに、Unityで作成したアプリをライブラリとして埋め込む機能が提供されています。
この中にはWindowsアプリケーションも含まれています。Windows では以下の3つの方法が紹介されています。
- UWP
- Unityを外部プロセスとして起動する
- Unityをdllとしてビルドし、直接ロードする
今回はこの中からWPFでUnityを外部プロセスとして起動する実装例を紹介します。
他にこんな記事も書いています。
目次
参考
以下のサイトを参考にさせていただきました。ありがとうございます。
実装例
Unity でビルドしたWindowsスタンドアロンアプリケーションを、コマンドライン引数 -parentHWND で起動すると別のアプリケーションに埋め込むことができます。
Unity - Manual: Command line arguments
記事のリサイズ可能なサンプルコードを参考に実装していきます。
まずは、HwndHost を継承した UnityHost クラスを作成します。
    class UnityHost : HwndHost
    {
        private Process _childProcess;
        private HandleRef _childHandleRef;

        private const int WM_ACTIVATE = 0x0006;
        private const int WM_CLOSE = 0x0010;
        private readonly IntPtr WA_ACTIVE = new IntPtr(1);
        private readonly IntPtr WA_INACTIVE = new IntPtr(0);

        public string AppPath { get; set; }

        protected override HandleRef BuildWindowCore(HandleRef hwndParent)
        {
            var cmdline = $"-parentHWND {hwndParent.Handle}";
            _childProcess = Process.Start(AppPath, cmdline);

            while (true)
            {
                var hwndChild = User32.FindWindowEx(hwndParent.Handle, IntPtr.Zero, null, null);
                if (hwndChild != IntPtr.Zero)
                {
                    User32.SendMessage(hwndChild, WM_ACTIVATE, WA_ACTIVE, IntPtr.Zero);

                    return _childHandleRef = new HandleRef(this, hwndChild);
                }
                Thread.Sleep(100);
            }
        }

        protected override void DestroyWindowCore(HandleRef hwnd)
        {
            User32.PostMessage(_childHandleRef.Handle, WM_CLOSE, IntPtr.Zero, IntPtr.Zero);

            var counter = 30;
            while (!_childProcess.HasExited)
            {
                if (--counter < 0)
                {
                    Debug.WriteLine("Process not dead yet, killing...");
                    _childProcess.Kill();
                }
                Thread.Sleep(100);
            }
            _childProcess.Dispose();
        }
    }
    static class User32
    {
        [DllImport("user32.dll")]
        public static extern IntPtr FindWindowEx(IntPtr hParent, IntPtr hChildAfter, string pClassName, string pWindowName);

        [DllImport("user32.dll")]
        public static extern int SendMessage(IntPtr hWnd, int msg, IntPtr wParam, IntPtr lParam);

        [DllImport("user32.dll")]
        public static extern IntPtr PostMessage(IntPtr hWnd, UInt32 Msg, IntPtr wParam, IntPtr lParam);
    }
違いはアクティベートのメッセージを送ったり、終了処理を手厚くしてるところでしょうか。アクティベートすることで、Unity側の画面で入力を受け付けるようになります。*1
続いてウィンドウ側の実装です。
        public MainWindow()
        {
            InitializeComponent();
            Loaded += MainWindow_Loaded;
        }

        private async void MainWindow_Loaded(object sender, RoutedEventArgs e)
        {
            if (!System.ComponentModel.DesignerProperties.GetIsInDesignMode(this))
            {
                grid.Children.Add(new UnityHost
                {
                    AppPath = @"生成したUnityアプリのパス.exe"
                });
            }
        }
XAMLに直接 UnityHost を当てると、デザイナーが読み込んでCPUが急上昇したのでコード側から差し込むようにしています。
これで Unity をホストすることができました。

ただ WPF と Unity で何らかのデータのやり取りをしたい場合は、ここからプロセス間通信の話になります。
プロセス間通信に関しては以下の記事がありますので参考にしてみてください。
- MagicOnion(建設中)
- .NET - MemoryMappedFile を使ったプロセス間通信
- .NET - MemoryMappedFile を使ったプロセス間通信 (MessagePack for C# 編)
- .NET - NamedPipe(名前付きパイプ)を使ったプロセス間通信
子プロセスを扱う場合、終了に関しては色々ありそうなので気をつけたいところです。
- 子プロセス以下のプロセスツリーを強制終了 - Qiita
- c# - Kill child process when parent process is killed - Stack Overflow
- c# - Working example of CreateJobObject/SetInformationJobObject pinvoke in .net? - Stack Overflow
注意すべき点
Unity を追加するコントロールなどを Collapsed で非表示にすると、Unity の CPU が爆上がりするようです。 対処法としては、コントロールを非表示にするのではなくコントロールの幅や高さなどを0にします。見えなくても表示されていれば CPU を持っていかれることはないようです。