yotiky Tech Blog

とあるエンジニアの備忘録

Unity - Unityを外部プロセスとしてWPFでホストする(Unity as a Library)(2)

前回の記事で WPF で Unity をホストする実装例を紹介しました。 参考にさせて頂いた記事では、続きに Unity の起動画面がWindow全体に表示されてしまう問題を対処しています。

yotiky.hatenablog.com

手元でも同じように全体に表示されたため、続きのコードを試してみましたが、一瞬というわけでもなく再描画で計算されるまで、フルサイズから戻らない現象がどうしても解決しませんでした。

そこで今回は、stackoverflow に掲載されていた実装例を参考にします。
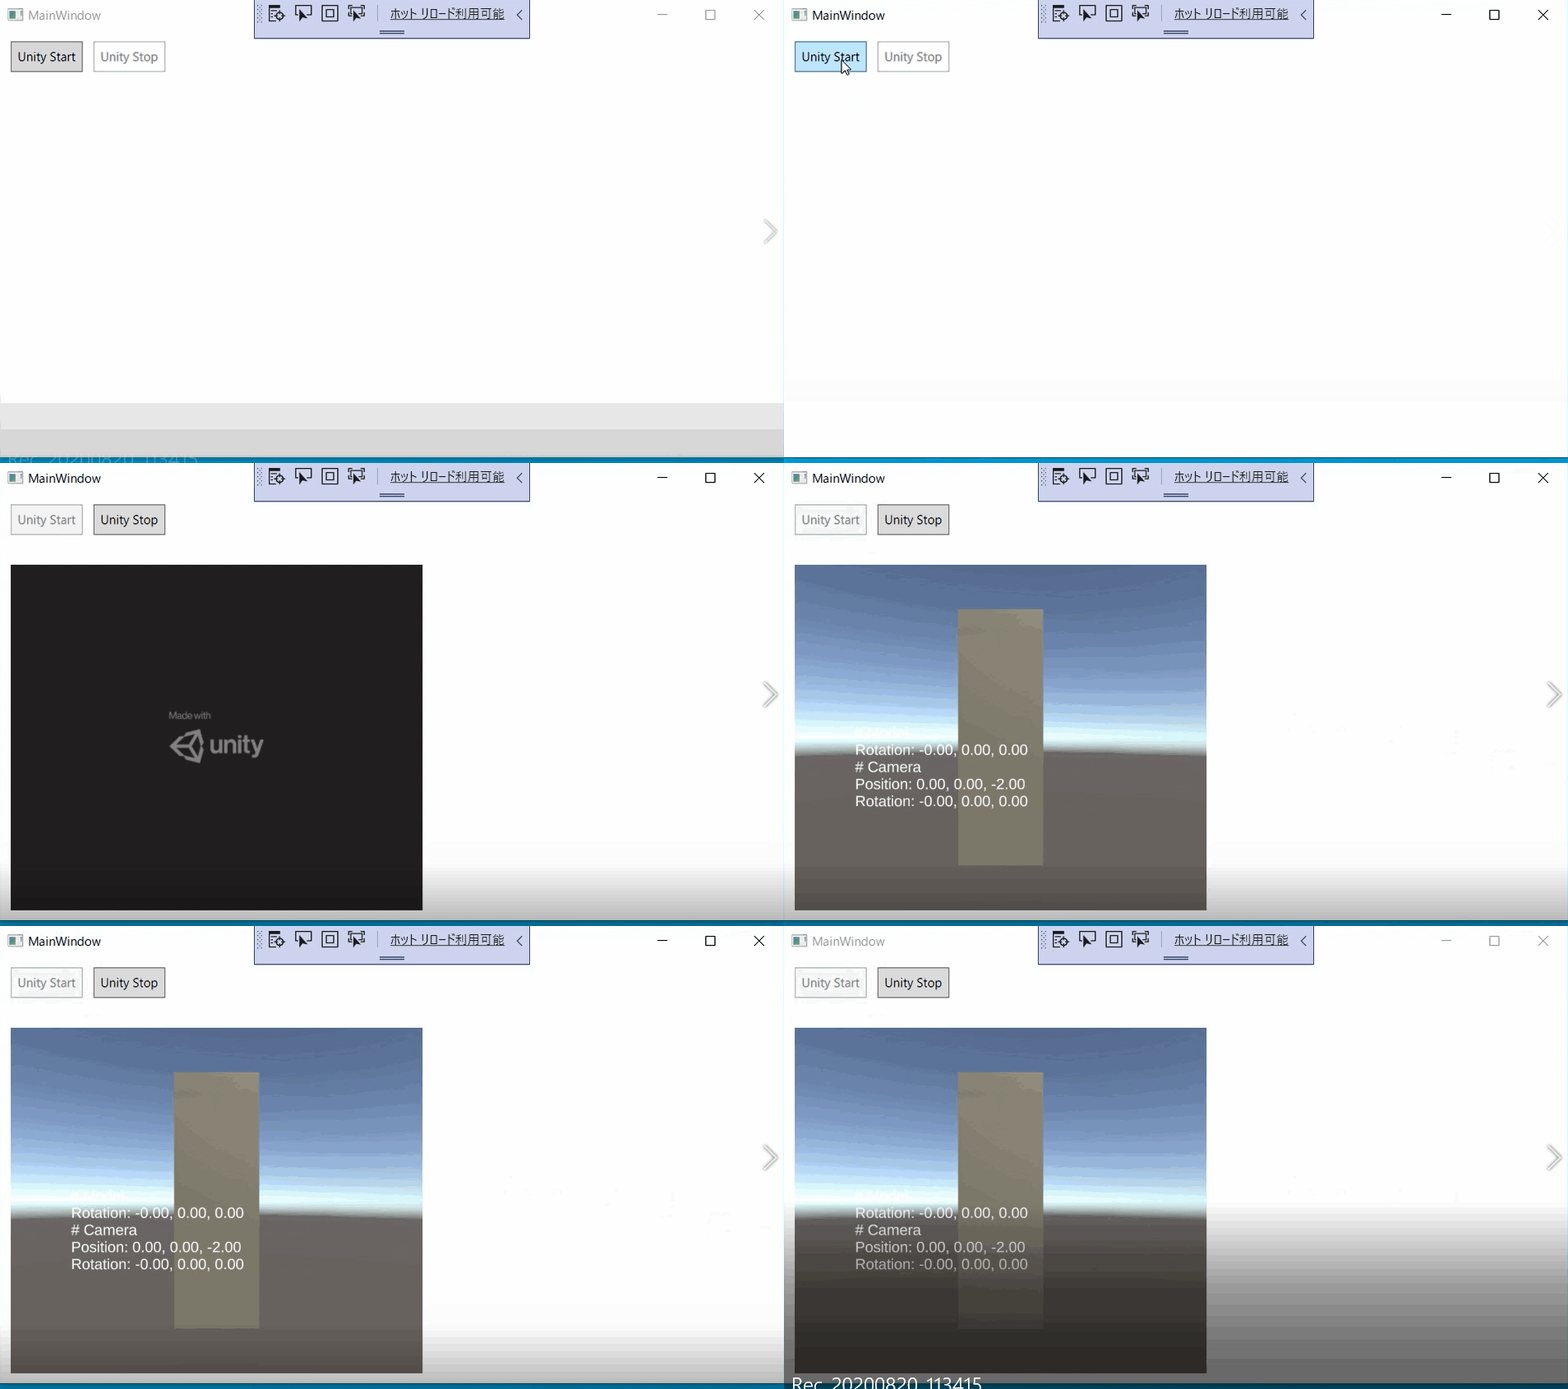
f:id:yotiky:20200820170441g:plain:w300

目次

実装例

UnityHwndHost

こちらのコードを使わせて頂きました。

前回の記事と重複する内容もありますが、Unity をホストするのにいくつか手を加えています。

以下コード全文です。その後に修正した部分を説明します。

public class UnityHwndHost : HwndHost
{
    internal delegate int WindowEnumProc(IntPtr hwnd, IntPtr lparam);
    [DllImport("user32.dll")]
    internal static extern bool EnumChildWindows(IntPtr hwnd, WindowEnumProc func, IntPtr lParam);
    [DllImport("user32.dll", SetLastError = true)]
    internal static extern uint GetWindowThreadProcessId(IntPtr hwnd, out uint processId);
    [DllImport("user32.dll", EntryPoint = "GetWindowLong")]
    internal static extern IntPtr GetWindowLong32(IntPtr hWnd, Int32 nIndex);
    [DllImport("user32.dll", EntryPoint = "GetWindowLongPtr")]
    internal static extern IntPtr GetWindowLongPtr64(IntPtr hWnd, Int32 nIndex);
    internal const Int32 GWLP_USERDATA = -21;
    [DllImport("user32.dll", CharSet = CharSet.Auto)]
    internal static extern IntPtr SendMessage(IntPtr hWnd, UInt32 Msg, IntPtr wParam, IntPtr lParam);
    [DllImport("user32.dll", CharSet = CharSet.Auto)]
    internal static extern IntPtr PostMessage(IntPtr hWnd, UInt32 Msg, IntPtr wParam, IntPtr lParam);
    internal const UInt32 WM_CLOSE = 0x0010;

    private string programName;
    private string arguments;
    private Process process = null;
    private IntPtr unityHWND = IntPtr.Zero;

    private JobObject job;

    private const int WM_ACTIVATE = 0x0006;
    private readonly IntPtr WA_ACTIVE = new IntPtr(1);
    private readonly IntPtr WA_INACTIVE = new IntPtr(0);

    public UnityHwndHost(string programName, string arguments = "")
    {
        this.programName = programName;
        this.arguments = arguments;
    }

    protected override HandleRef BuildWindowCore(HandleRef hwndParent)
    {
        Debug.WriteLine("Going to launch Unity at: " + this.programName + " " + this.arguments);
        process = new Process();
        process.StartInfo.FileName = programName;
        process.StartInfo.Arguments = arguments + (arguments.Length == 0 ? "" : " ") + "-parentHWND " + hwndParent.Handle;
        process.StartInfo.UseShellExecute = true;
        process.StartInfo.CreateNoWindow = true;

        process.Start();
        process.WaitForInputIdle();

        job = JobObject.CreateAsKillOnJobClose();
        job.AssignProcess(process);

        int repeat = 50;
        while (unityHWND == IntPtr.Zero && repeat-- > 0)
        {
            Thread.Sleep(100);
            EnumChildWindows(hwndParent.Handle, WindowEnum, IntPtr.Zero);
        }
        if (unityHWND == IntPtr.Zero)
            throw new Exception("Unable to find Unity window");
        Debug.WriteLine("Found Unity window: " + unityHWND);

        repeat += 150;
        while ((GetWindowLong(unityHWND, GWLP_USERDATA).ToInt32() & 1) == 0 && --repeat > 0)
        {
            Thread.Sleep(100);
            Debug.WriteLine("Waiting for Unity to initialize... " + repeat);
        }
        if (repeat == 0)
        {
            Debug.WriteLine("Timed out while waiting for Unity to initialize");
        }
        else
        {
            Debug.WriteLine("Unity initialized!");
        }

        ActivateUnityWindow();

        return new HandleRef(this, unityHWND);
    }

    private void ActivateUnityWindow()
    {
        SendMessage(unityHWND, WM_ACTIVATE, WA_ACTIVE, IntPtr.Zero);
    }

    private void DeactivateUnityWindow()
    {
        SendMessage(unityHWND, WM_ACTIVATE, WA_INACTIVE, IntPtr.Zero);
    }

    private int WindowEnum(IntPtr hwnd, IntPtr lparam)
    {
        if (unityHWND != IntPtr.Zero)
            throw new Exception("Found multiple Unity windows");
        unityHWND = hwnd;
        return 0;
    }
    private IntPtr GetWindowLong(IntPtr hWnd, int nIndex)
    {
        if (IntPtr.Size == 4)
        {
            return GetWindowLong32(hWnd, nIndex);
        }
        return GetWindowLongPtr64(hWnd, nIndex);
    }

    protected override void DestroyWindowCore(HandleRef hwnd)
    {
        Destroy();
    }

    public void Destroy()
    {
        Debug.WriteLine("Asking Unity to exit...");
        PostMessage(unityHWND, WM_CLOSE, IntPtr.Zero, IntPtr.Zero);

        job.Dispose();
        job = null;
        process.Dispose();
        process = null;
        unityHWND = IntPtr.Zero;
    }
}


まず、GetWindowLong が32ビットと64ビットで違うらしく、TODOついていたので出し別けるようにしました。64ビットでしかテストしてないですが。

        [DllImport("user32.dll", EntryPoint = "GetWindowLong")]
        internal static extern IntPtr GetWindowLong32(IntPtr hWnd, Int32 nIndex);
        [DllImport("user32.dll", EntryPoint = "GetWindowLongPtr")]
        internal static extern IntPtr GetWindowLongPtr64(IntPtr hWnd, Int32 nIndex);

        private IntPtr GetWindowLong(IntPtr hWnd, int nIndex)
        {
            if (IntPtr.Size == 4)
            {
                return GetWindowLong32(hWnd, nIndex);
            }
            return GetWindowLongPtr64(hWnd, nIndex);
        }


次に、BuildWindowCore の最後でアクティベートのメッセージを送っています。これを入れることでWPFで上でUnityの画面を操作できるようになります。

    ActivateUnityWindow();

    return new HandleRef(this, unityHWND);


続いて、Unity の子プロセスが確実に終了するように JobObject を使うようにします。JobObject の実装やプロセスが終了しない場合の詳細などは以下の記事を御覧ください。

yotiky.hatenablog.com

プロセス開始時にアサインして、

    job = JobObject.CreateAsKillOnJobClose();
    job.AssignProcess(process);

終了時に Dispose を呼んであげます。

    PostMessage(unityHWND, WM_CLOSE, IntPtr.Zero, IntPtr.Zero);

    job.Dispose();
    job = null;

元のコードはプロセスが残っていたら Process を Kill する処理になっていますが、Dispose を呼んであげれば子プロセスは終了します。また、すでに終了している場合でも例外が発生しないので HasExited の判定も消しています。

使い方

任意のコンポーネントに追加してあげるだけです。

    if (!System.ComponentModel.DesignerProperties.GetIsInDesignMode(this))
    {
        unityGrid.Children.Add(new UnityHwndHost(@"UnityApp.exe", "-possibly -other -arguments"));
    }

注意すべき点

Unity を追加するコントロールなどを Collapsed で非表示にすると、Unity の CPU が爆上がりするようです。 対処法としては、コントロールを非表示にするのではなくコントロールの幅や高さなどを0にします。見えなくても表示されていれば CPU を持っていかれることはないようです。

.NET - 子プロセスを確実に終了させる

実装例

こちらここのコメント欄などが参考になりそうです。今回はQiitaの記事のコードを使わせて頂きました。

    public class JobObject : IDisposable
    {
        public static JobObject CreateAsKillOnJobClose()
        {
            var job = new JobObject();

            var jobInfo = new JOBOBJECT_EXTENDED_LIMIT_INFORMATION()
            {
                BasicLimitInformation = new JOBOBJECT_BASIC_LIMIT_INFORMATION()
                {
                    LimitFlags = JobObjectLimit.KillOnJobClose
                },
            };
            var size = Marshal.SizeOf(typeof(JOBOBJECT_EXTENDED_LIMIT_INFORMATION));
            if (!Native.SetInformationJobObject(job.SafeHandle, JobObjectInfoClass.ExtendedLimitInformation, ref jobInfo, size))
            {
                throw new Win32Exception();
            }

            return job;
        }

        private JobObject(SafeJobHandle safeHandle) => SafeHandle = safeHandle;

        private JobObject(string name = null)
        {
            SafeHandle = Native.CreateJobObject(IntPtr.Zero, name);
            if (SafeHandle.IsInvalid)
                throw new Win32Exception();
        }

        public void AssignProcess(int processId)
        {
            using (var hProcess = Native.OpenProcess(ProcessAccessFlags.SetQuota | ProcessAccessFlags.Terminate, false, processId))
            {
                AssignProcess(hProcess);
            }
        }

        public void AssignProcess(System.Diagnostics.Process process)
            => AssignProcess(process.SafeHandle);

        public void AssignProcess(SafeProcessHandle hProcess)
        {
            if (hProcess.IsInvalid)
                throw new ArgumentException(nameof(hProcess));

            if (!Native.AssignProcessToJobObject(SafeHandle, hProcess))
            {
                throw new Win32Exception();
            }
        }

        public void Terminate(int exitCode = 0)
        {
            if (!Native.TerminateJobObject(SafeHandle, exitCode))
            {
                throw new Win32Exception();
            }
        }

        public SafeJobHandle SafeHandle { get; private set; }

        #region IDisposable Support
        private bool _disposedValue = false;

        protected virtual void Dispose(bool disposing)
        {
            if (!_disposedValue)
            {
                if (disposing)
                {
                    SafeHandle.Dispose();
                }

                _disposedValue = true;
            }
        }

        public void Dispose()
        {
            Dispose(true);
        }
        #endregion
    }
    public sealed class SafeJobHandle : SafeHandleZeroOrMinusOneIsInvalid
    {
        internal static SafeJobHandle InvalidHandle => new SafeJobHandle(IntPtr.Zero);

        private SafeJobHandle()
            : base(true)
        {
        }

        internal SafeJobHandle(IntPtr handle)
            : base(true) => base.SetHandle(handle);

        protected override bool ReleaseHandle() => Native.CloseHandle(base.handle);
    }
    [Flags]
    enum ProcessAccessFlags : uint
    {
        None = 0,
        All = 0x001F0FFF,
        Terminate = 0x00000001,
        CreateThread = 0x00000002,
        VirtualMemoryOperation = 0x00000008,
        VirtualMemoryRead = 0x00000010,
        VirtualMemoryWrite = 0x00000020,
        DuplicateHandle = 0x00000040,
        CreateProcess = 0x000000080,
        SetQuota = 0x00000100,
        SetInformation = 0x00000200,
        QueryInformation = 0x00000400,
        QueryLimitedInformation = 0x00001000,
        Synchronize = 0x00100000,
    }
    enum JobObjectInfoClass
    {
        AssociateCompletionPortInformation = 7,
        BasicLimitInformation = 2,
        BasicUIRestrictions = 4,
        EndOfJobTimeInformation = 6,
        ExtendedLimitInformation = 9,
        SecurityLimitInformation = 5,
        GroupInformation = 11,
    }
    [Flags]
    enum JobObjectLimit : uint
    {
        None = 0,
        // Basic Limits
        Workingset = 0x00000001,
        ProcessTime = 0x00000002,
        JobTime = 0x00000004,
        ActiveProcess = 0x00000008,
        Affinity = 0x00000010,
        PriorityClass = 0x00000020,
        PreserveJobTime = 0x00000040,
        SchedulingClass = 0x00000080,

        // Extended Limits
        ProcessMemory = 0x00000100,
        JobMemory = 0x00000200,
        DieOnUnhandledException = 0x00000400,
        BreakawayOk = 0x00000800,
        SilentBreakawayOk = 0x00001000,
        KillOnJobClose = 0x00002000,
        SubsetAffinity = 0x00004000,

        // Notification Limits
        JobReadBytes = 0x00010000,
        JobWriteBytes = 0x00020000,
        RateControl = 0x00040000,
    }
    [StructLayout(LayoutKind.Sequential)]
    struct JOBOBJECT_BASIC_LIMIT_INFORMATION
    {
        public Int64 PerProcessUserTimeLimit;
        public Int64 PerJobUserTimeLimit;
        public JobObjectLimit LimitFlags;
        public UIntPtr MinimumWorkingSetSize;
        public UIntPtr MaximumWorkingSetSize;
        public UInt32 ActiveProcessLimit;
        public Int64 Affinity;
        public UInt32 PriorityClass;
        public UInt32 SchedulingClass;
    }
    [StructLayout(LayoutKind.Sequential)]
    struct IO_COUNTERS
    {
        public UInt64 ReadOperationCount;
        public UInt64 WriteOperationCount;
        public UInt64 OtherOperationCount;
        public UInt64 ReadTransferCount;
        public UInt64 WriteTransferCount;
        public UInt64 OtherTransferCount;
    }
    [StructLayout(LayoutKind.Sequential)]
    struct JOBOBJECT_EXTENDED_LIMIT_INFORMATION
    {
        public JOBOBJECT_BASIC_LIMIT_INFORMATION BasicLimitInformation;
        public IO_COUNTERS IoInfo;
        public UIntPtr ProcessMemoryLimit;
        public UIntPtr JobMemoryLimit;
        public UIntPtr PeakProcessMemoryUsed;
        public UIntPtr PeakJobMemoryUsed;
    }
    static class Native
    {
        [DllImport("kernel32.dll", SetLastError = true)]
        [return: MarshalAs(UnmanagedType.Bool)]
        public static extern bool SetInformationJobObject(SafeJobHandle hJob,
           JobObjectInfoClass JobObjectInfoClass,
           ref JOBOBJECT_EXTENDED_LIMIT_INFORMATION lpJobObjectInfo,
           int cbJobObjectInfoLength);

        [DllImport("kernel32.dll", SetLastError = true)]
        [return: MarshalAs(UnmanagedType.Bool)]
        public static extern bool AssignProcessToJobObject(SafeJobHandle hJob, SafeProcessHandle hProcess);

        [DllImport("kernel32.dll", SetLastError = true)]
        public static extern SafeProcessHandle OpenProcess(
             ProcessAccessFlags processAccess,
             bool bInheritHandle,
             int processId);

        [DllImport("kernel32.dll", SetLastError = true)]
        public static extern SafeJobHandle CreateJobObject(IntPtr lpJobAttributes, string lpName);

        [DllImport("kernel32.dll", SetLastError = true)]
        [return: MarshalAs(UnmanagedType.Bool)]
        public extern static bool CloseHandle(IntPtr handle);

        [DllImport("kernel32.dll", SetLastError = true)]
        [return: MarshalAs(UnmanagedType.Bool)]
        public extern static bool TerminateJobObject(SafeJobHandle handle, int uExitCode);
    }

使い方は以下の通りで、Disposeが呼ばれるとProcessが終了します。

    process.Start();
    process.WaitForInputIdle();

    using(job = JobObject.CreateAsKillOnJobClose())
    {
        job.AssignProcess(process);
    }

ただしこのままだと子プロセス側は強制終了させられちゃうので、通常時に子プロセスを Kill するような終了方法を好まない状況では Dispose をそのまま呼べません。

通常終了

終了がハンドリングできる状況で後処理を待ちたい場合では、子プロセスに WM_CLOSE メッセージを送って終了させます。終了しない場合に Kill を呼びますが、代わりに JobObject の Dispose を呼んであげればプロセスが終了します。

プロセスを Kill する場合の終了時の実装例。(過去記事より

        User32.PostMessage(_childHandleRef.Handle, WM_CLOSE, IntPtr.Zero, IntPtr.Zero);

        var counter = 30;
        while (!_childProcess.HasExited)
        {
            if (--counter < 0)
            {
                Debug.WriteLine("Process not dead yet, killing...");
                _childProcess.Kill();
            }
            Thread.Sleep(100);
        }
        _childProcess.Dispose();

JobObject を使った実装例。

        User32.PostMessage(_childHandleRef.Handle, WM_CLOSE, IntPtr.Zero, IntPtr.Zero);

        while (!_childProcess.HasExited)
        {
            job.Dispose();
        }
        _childProcess.Dispose();

Unity as a Library で WPFでUnityをホストするという記事を書きましたが、子プロセスがゾンビ化しやすいので注意が必要です。次の画像はWPFを起動しUnityを読み込んだ状態です。 f:id:yotiky:20200820051357p:plain

ここで Visual Studioデバッグを停止したり、タスクマネージャーからWPFのみ終了させるなどの方法を取った場合、Unityのプロセスは残り続けます。しかもたちが悪いことにCPUとGPUをどか食い。。 WPFでUnityをホストする場合には、確実に終了させる方法が必須そうです。 f:id:yotiky:20200820051449p:plain

WPF - アプリ終了時に非同期処理を実行して終了する

環境

  • .NET Core 3.1

実装例

終了のイベントをフックして、非同期な後処理を呼びつつイベント自体はキャンセルし、後処理が終わったらそのままアプリが終了するようにします。

public MainWindow()
{
    Closing += MainWindow_Closing;
}

private bool isCalledQuit;
private bool isCleanuped;
private void MainWindow_Closing(object sender, CancelEventArgs e)
{
    if (isCleanuped) { return; }

    if (!isCalledQuit)
    {
        Quit();
    }
    e.Cancel = true;
}
private async void Quit()
{
    isCalledQuit = true;

    // 何か非同期な後処理

    isCleanuped = true;
    this.Close();
}

Unity - アプリ終了時に非同期処理を実行して終了する

環境

  • Unity 2019.4.3f1

実装例

終了のイベントをフックして、非同期な後処理を呼びつつイベント自体はキャンセルし、後処理が終わったらそのままアプリが終了するようにします。

void Start()
{
    Application.wantsToQuit += Application_wantsToQuit;
}

private bool Application_wantsToQuit()
{
    CleanUp();
    return false;
}

bool cleanuping;
async void CleanUp()
{
    if (!cleanuping)
    {
        try
        {
            cleanuping = true;
            Debug.Log("Disposing ...");
            // 何か非同期な後処理
        }
        catch (Exception e)
        {
            Debug.LogError(e.Message);
        }
    }
    Application.wantsToQuit -= Application_wantsToQuit;
    Application.Quit();
}

Unity - Unityを外部プロセスとしてWPFでホストする(Unity as a Library)

Unity 2019.3以降、「Unity as a Library」というAndroidiOSのネイティブアプリに、Unityで作成したアプリをライブラリとして埋め込む機能が提供されています。

この中にはWindowsアプリケーションも含まれています。Windows では以下の3つの方法が紹介されています。

  • UWP
  • Unityを外部プロセスとして起動する
  • Unityをdllとしてビルドし、直接ロードする

unity.com

今回はこの中からWPFでUnityを外部プロセスとして起動する実装例を紹介します。

docs.unity3d.com

他にこんな記事も書いています。

目次

参考

以下のサイトを参考にさせていただきました。ありがとうございます。

実装例

Unity でビルドしたWindowsスタンドアロンアプリケーションを、コマンドライン引数 -parentHWND で起動すると別のアプリケーションに埋め込むことができます。

Unity - Manual: Command line arguments

記事のリサイズ可能なサンプルコードを参考に実装していきます。
まずは、HwndHost を継承した UnityHost クラスを作成します。

    class UnityHost : HwndHost
    {
        private Process _childProcess;
        private HandleRef _childHandleRef;

        private const int WM_ACTIVATE = 0x0006;
        private const int WM_CLOSE = 0x0010;
        private readonly IntPtr WA_ACTIVE = new IntPtr(1);
        private readonly IntPtr WA_INACTIVE = new IntPtr(0);

        public string AppPath { get; set; }

        protected override HandleRef BuildWindowCore(HandleRef hwndParent)
        {
            var cmdline = $"-parentHWND {hwndParent.Handle}";
            _childProcess = Process.Start(AppPath, cmdline);

            while (true)
            {
                var hwndChild = User32.FindWindowEx(hwndParent.Handle, IntPtr.Zero, null, null);
                if (hwndChild != IntPtr.Zero)
                {
                    User32.SendMessage(hwndChild, WM_ACTIVATE, WA_ACTIVE, IntPtr.Zero);

                    return _childHandleRef = new HandleRef(this, hwndChild);
                }
                Thread.Sleep(100);
            }
        }

        protected override void DestroyWindowCore(HandleRef hwnd)
        {
            User32.PostMessage(_childHandleRef.Handle, WM_CLOSE, IntPtr.Zero, IntPtr.Zero);

            var counter = 30;
            while (!_childProcess.HasExited)
            {
                if (--counter < 0)
                {
                    Debug.WriteLine("Process not dead yet, killing...");
                    _childProcess.Kill();
                }
                Thread.Sleep(100);
            }
            _childProcess.Dispose();
        }
    }
    static class User32
    {
        [DllImport("user32.dll")]
        public static extern IntPtr FindWindowEx(IntPtr hParent, IntPtr hChildAfter, string pClassName, string pWindowName);

        [DllImport("user32.dll")]
        public static extern int SendMessage(IntPtr hWnd, int msg, IntPtr wParam, IntPtr lParam);

        [DllImport("user32.dll")]
        public static extern IntPtr PostMessage(IntPtr hWnd, UInt32 Msg, IntPtr wParam, IntPtr lParam);
    }

違いはアクティベートのメッセージを送ったり、終了処理を手厚くしてるところでしょうか。アクティベートすることで、Unity側の画面で入力を受け付けるようになります。*1

続いてウィンドウ側の実装です。

        public MainWindow()
        {
            InitializeComponent();
            Loaded += MainWindow_Loaded;
        }

        private async void MainWindow_Loaded(object sender, RoutedEventArgs e)
        {
            if (!System.ComponentModel.DesignerProperties.GetIsInDesignMode(this))
            {
                grid.Children.Add(new UnityHost
                {
                    AppPath = @"生成したUnityアプリのパス.exe"
                });
            }
        }

XAMLに直接 UnityHost を当てると、デザイナーが読み込んでCPUが急上昇したのでコード側から差し込むようにしています。

これで Unity をホストすることができました。

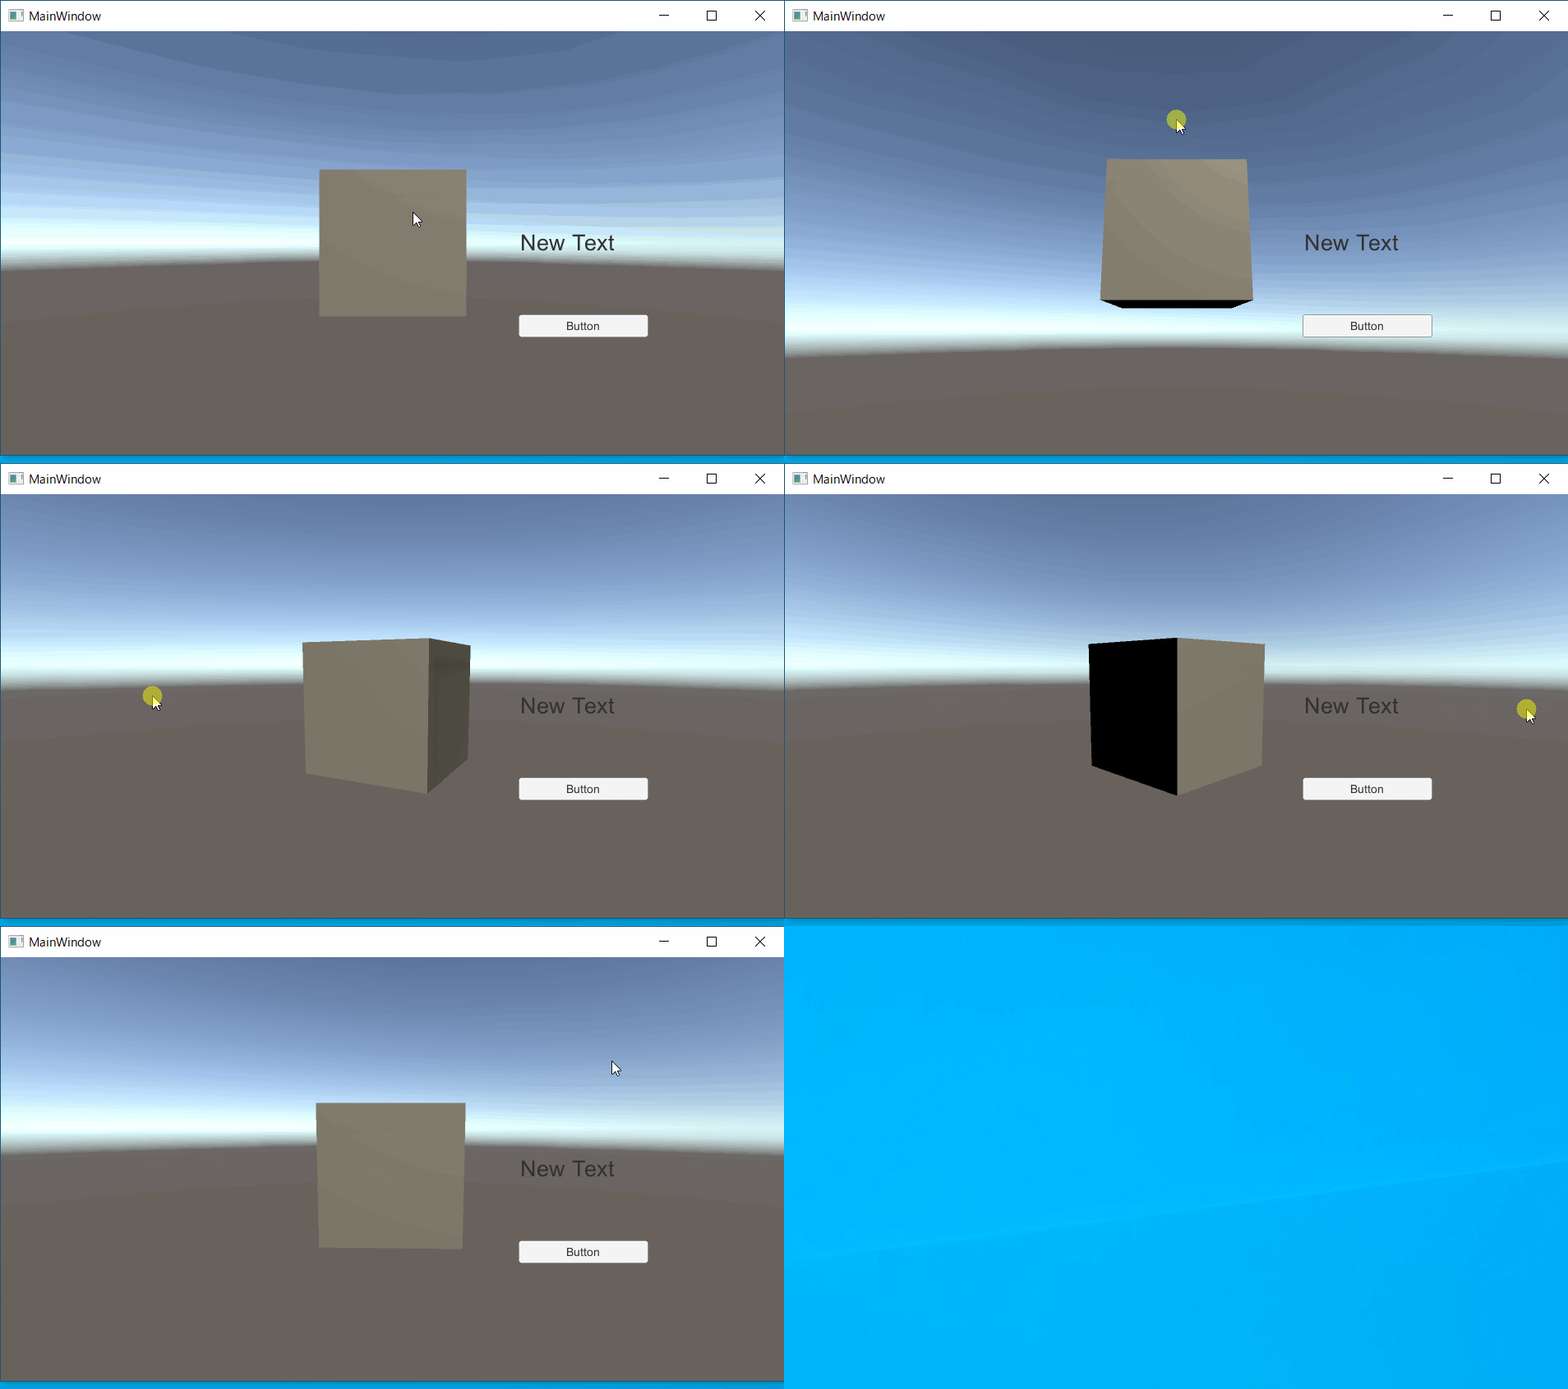
f:id:yotiky:20200810084753g:plain

ただ WPF と Unity で何らかのデータのやり取りをしたい場合は、ここからプロセス間通信の話になります。

プロセス間通信に関しては以下の記事がありますので参考にしてみてください。

子プロセスを扱う場合、終了に関しては色々ありそうなので気をつけたいところです。

注意すべき点

Unity を追加するコントロールなどを Collapsed で非表示にすると、Unity の CPU が爆上がりするようです。 対処法としては、コントロールを非表示にするのではなくコントロールの幅や高さなどを0にします。見えなくても表示されていれば CPU を持っていかれることはないようです。
.NET - WebGLをWPFでホストする(WebView2 で Unity as a Library)

Unity 2019.3以降、「Unity as a Library」というAndroidiOSのネイティブアプリに、Unityで作成したアプリをライブラリとして埋め込む機能が提供されています。

unity.com

WebGL 自体はこの中に含まれないのですが、検証ついでに Unity で生成した WebGL のコンテンツを WPF で動かしたのでその覚書になります。

導入

WPF で標準で使える WebBrowser では IE の古いバージョンを使用しているらしく、WebGL がサポートされていません。*1 以前はレジストリをいじるなどの方法を使ったりしたようですが、WebView2 (Preview)を導入すると WebGL がサポートされた Edge(Chromium)を使用するので WebGL を表示できるようになります。

docs.microsoft.com

WebView2 の WPF でのチュートリアルは以下にあります。

docs.microsoft.com

前提条件にあるように、Microsoft EdgeChromium)Canaryチャネル のインストールが必要になります。

手順

  1. Unity で WebGL 向けのアプリを作ってビルドする f:id:yotiky:20200810053102p:plain

  2. WPF のプロジェクトを作成する(今回は .NET Core)

  3. NuGet で Microsoft.Web.WebView2 をインストールする
    プレリリースを含めて検索した上で prerelease 版を選択してください。 f:id:yotiky:20200810055447p:plain

  4. XAML を編集する

<Window x:Class="WpfApp1.MainWindow"
        xmlns="http://schemas.microsoft.com/winfx/2006/xaml/presentation"
        xmlns:x="http://schemas.microsoft.com/winfx/2006/xaml"
        xmlns:d="http://schemas.microsoft.com/expression/blend/2008"
        xmlns:mc="http://schemas.openxmlformats.org/markup-compatibility/2006"
        xmlns:wv2="clr-namespace:Microsoft.Web.WebView2.Wpf;assembly=Microsoft.Web.WebView2.Wpf"
        xmlns:local="clr-namespace:WpfApp1"
        mc:Ignorable="d"
        Title="MainWindow" Height="450" Width="800">
    <Grid>
        <wv2:WebView2 Name="browser" Source=""/>
    </Grid>
</Window>

 5.コードを編集する

        public MainWindow()
        {
            InitializeComponent();
            Loaded += MainWindow_Loaded;
        }

        private void MainWindow_Loaded(object sender, RoutedEventArgs e)
        {
            if (!System.ComponentModel.DesignerProperties.GetIsInDesignMode(this))
            {
                browser.Source = new Uri("http://127.0.0.1:8887/");
            }
        }

 XAML に直接URLを埋め込むとデザイナーが読み込みに行ってしまうので、状況に応じてコード側から書き換えてあげると良いでしょう。

 6.WebGL をローカルでホストする

 手っ取り早く以下の手順で実行しました。URLを先のコードのURL部分に埋め込んでください。

 yotiky.hatenablog.com

 7. 実行する  f:id:yotiky:20200810061645g:plain

Unity - System.Threading.Channels で生産者/消費者パターンを利用する

今回は、System.Threading.Channels を Unity に導入した実装例です。 次の記事を参考にさせて頂きました。

qiita.com

前回の記事もご参考までに。

Unity - UniTask の Channel で生産者/消費者パターンを利用する - yotiky Tech Blog

検証環境

以下の環境で、Unity Editor 上で実行しています。

  • Unity 2019.3.15f1
  • Script Backend : Mono
  • Api Compability Lebel : .NET 4.x
  • System.Threading.Channels 4.7.1
  • system.threading.tasks.extensions.4.5.4
  • system.runtime.compilerservices.unsafe.4.7.1

目次

導入

まずは System.Threading.Channels を Unity プロジェクトに導入します。 以下のサイトより package をダウンロードし、zip ファイルにリネームして解凍します。System.Threading.Channels.dll を Unity プロジェクトにD&Dで。 Dependencies なライブラリがあるの続く2つのパッケージも同様にして、Unity に入れればOKです。

www.nuget.org

NuGet Gallery | System.Threading.Tasks.Extensions 4.5.4

NuGet Gallery | System.Runtime.CompilerServices.Unsafe 4.7.1

実装例

生産者 1 : 消費者 1

1対1の実装例です。ほとんど参考にさせて頂いた記事のコードのままです。

    async Task Single()
    {
        var channel = Channel.CreateUnbounded<int>(
            new UnboundedChannelOptions
            {
                SingleReader = true,
                SingleWriter = true,
            });

        var consumer = Task.Run(async () =>
        {
            while (await channel.Reader.WaitToReadAsync())
            {
                Debug.Log(await channel.Reader.ReadAsync());
            }
        });

        var producer = Task.Run(async () =>
        {
            await channel.Writer.WriteAsync(1);
            await channel.Writer.WriteAsync(2);
            await channel.Writer.WriteAsync(3);
            channel.Writer.Complete();
        });

        await Task.WhenAll(consumer, producer);

        Debug.Log("Completed.");
    }

実行結果です。

1
2
3

生産者 n : 消費者 1

n対1の実装例です。

    async Task MultiToSingle()
    {
        var channel = Channel.CreateUnbounded<int>(
            new UnboundedChannelOptions
            {
                SingleReader = true,
            });

        var consumer = Task.Run(async () =>
        {
            while (await channel.Reader.WaitToReadAsync())
            {
                Debug.Log("Producer" + await channel.Reader.ReadAsync());
            }
        });

        var producers = Enumerable.Range(1, 3)
            .Select(producerId =>
                Task.Run(async () =>
                {
                    await channel.Writer.WriteAsync(producerId);
                }));

        await Task.WhenAll(producers);
        channel.Writer.Complete();

        await consumer;

        Debug.Log("Completed.");
    }

実行結果です。

Producer1
Producer2
Producer3

生産者 1 : 消費者 n

最後に 1対nの実装例です。先に説明したとおり、複数の消費者はキューを消費するわけではなく、等しく購読するので注意が必要です。

    async Task SingleToMulti()
    {
        var channel = Channel.CreateUnbounded<int>(
            new UnboundedChannelOptions
            {
                SingleWriter = true,
            });

        var consumers = Enumerable.Range(1, 3)
            .Select(consumerId =>
                Task.Run(async () =>
                {
                    while (await channel.Reader.WaitToReadAsync())
                    {
                        if (channel.Reader.TryRead(out var value))
                        {
                            Debug.Log($"Consumer{consumerId}:{value}");
                        }
                    }
                }));

        var producer = Task.Run(async () =>
        {
            await channel.Writer.WriteAsync(1);
            await channel.Writer.WriteAsync(2);
            await channel.Writer.WriteAsync(3);
            channel.Writer.Complete();
        });

        await Task.WhenAll(consumers.Union(new[] { producer }));

        Debug.Log("Completed.");
    }

実行結果です。

Consumer2:3
Consumer1:1
Consumer3:2